Microsoft provides an inbuilt security feature in MS Excel so as to prevent unauthorized access to Excel documents. With this remarkable feature, you can set passwords on Workbook which in turn protect your Excel file by asking for password every time MS Excel file is open. In this tutorial, I will be explaining steps on how to protect Excel file with password.
Steps to protect Excel File of MS Excel 2013
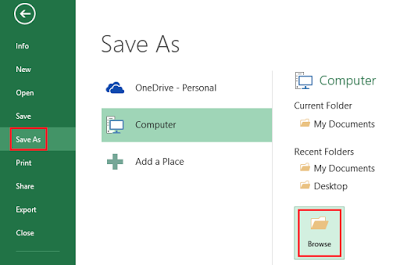
Step 1. Open Excel file which needs to be protected. Go to Save As option and Browse the location where you want to store protected workbook.
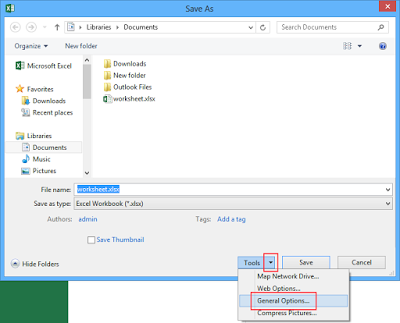
Step 2. In Save As window, go to arrow next to Tools then select General options as shown below.
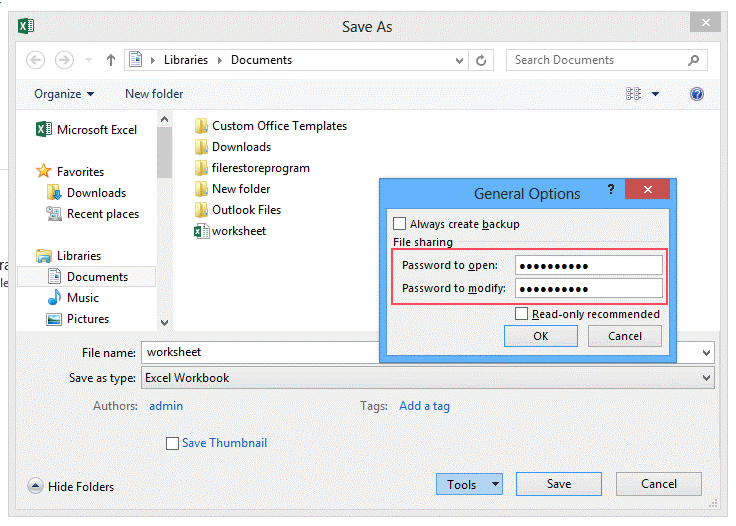
Step 3. In General options dialogue box, type password in order to protect your Excel file.
Step 4. The next screen will ask you to reenter password so that process gets completed. This dialogue box also displays message that if you forget the password, it cannot be recovered.

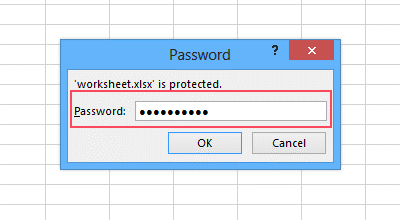
Once the password is set, if anyone attempts to open your Excel Workbook then they are required to type password as shown in below figure.
This inbuilt security feature is the easiest way to protect your valuable MS Excel file having XLS and XLSX extension.
Steps to protect Excel File of MS Excel 2013
Step 1. Open Excel file which needs to be protected. Go to Save As option and Browse the location where you want to store protected workbook.
Step 2. In Save As window, go to arrow next to Tools then select General options as shown below.
Step 3. In General options dialogue box, type password in order to protect your Excel file.
Step 4. The next screen will ask you to reenter password so that process gets completed. This dialogue box also displays message that if you forget the password, it cannot be recovered.
Once the password is set, if anyone attempts to open your Excel Workbook then they are required to type password as shown in below figure.
This inbuilt security feature is the easiest way to protect your valuable MS Excel file having XLS and XLSX extension.