- Feb 6, 2006
- 3,284
- 1
- 21,110
To keep this thread clean: for comments, questions, and/or suggestions pertaining to this thread, please post here:
http://www.tomshardware.com/forum/54096-35-hardware-repair-guide-suggestion-comment-thread
This guide is here to help you through any major difficulties you encounter with your notebook either in function or in disassembly. Because notebook designs are so different from model to model, I did my best to make it pretty detailed and covering all the bases of notebooks I've repaired before, so it is a bit lengthy. I'm writing up some other guides on doing more specific repairs like power jack resoldering and such, but this guide should tell you how to get to where you need to be and how to replace any general part on your notebook. First, I'll post a simple disclaimer...
Be advised this guide is general - all notebooks are different. Not all of the instructions will pertain to your notebook. I am not responsible for what happens to your notebook as a result of you reading this!
During the guide, I'll put in big red letters LIKE THIS at certain points to tell you where to stop if you're performing certain tasks like upgrading your RAM or replacing your power jack.
Notebooks are not unlike their desktop brethren, but sometimes do take extra care and tools to get the same jobs done. The tools listed here are ones I prefer, but you don't necessarily need them all. When taking apart a notebook, these are the tools that are on my desk:
-2 large magnets - These are an excellent way to hold your screws in place and remember where they go...you can get easily confused. If you don't have large magnets, you can substitute these with simple paper (don't hit it!) or paper covered in double-sided tape.
-Sets of screwdrivers, including a small precision set.
-A set of small pliers
-A strong point magnet (you'll see what this is for later)
-A small, single LED flashlight
A note about Electrostatic Discharge (ESD):
Many of you may be desktop veterans, and you all know that by leaving your PSU plugged in and touching the power supply with your bare hands, you can "ground" yourself, effectively clearing any static electricity in your hands that can kill sensitive computing components. Notebooks, though, are not equipped with internal power supplies, nor do they have dedicated grounds! You can solve this problem by touching any metal object nearby that is already grounded. While notebooks are not grounded, as they rely completely on DC power, most of the notebook's internal chassis is connected to the negative terminal, in effect, what's called a "chassis ground". This can help stop ESD if you make contact with it. And, of course, don't work on carpet or in a chair made of plastic or static-generating fabric.
For more, head here:
http://en.wikipedia.org/wiki/Electrostatic_discharge
A word to the wise:
If it won't move, don't force it to! Chances are you missed a screw someplace. Take some time and look at what you're working on. You'll find the place that's holding your component down soon enough.
~~~~~~~~~~~~~~~~~~~~~~~~~~~~~~~~~~~~~~~~~~~~~~~~~~~~~~
~~~~~~~~~~~~~~~~~~~~~~~~~~~~~~~~~~~~~~~~~~~~~~~~~~~~~~

Now, on to disassembly. Providing pictures for today is my brother's old(er) Toshiba, which I've actually never disassembled. It should give a good depiction on what's inside of a notebook that's rather dirty.
1. First, unplug your notebook and remove it's battery. Generally the battery has a release catch or locking mechanism on the bottom. It should be clearly marked. If your optical disk drive is equipped with a quick-release mechanism (usually a latch or catch on the bottom, but sometimes can also be a spring-loaded lever on the side of the notebook) you can remove it now. It may be held in place by a screw, so pay attention.
2. There are several (or may only be one) cut-out panels on the bottom of your notebook. Remove the screws holding them in and pop them off. You may need to use a flathead screwdriver to pry the panels off. What is revealed and how many panels there are depend on make and model, but here are some typical things that it may reveal:
-Your RAM
-Your wireless card
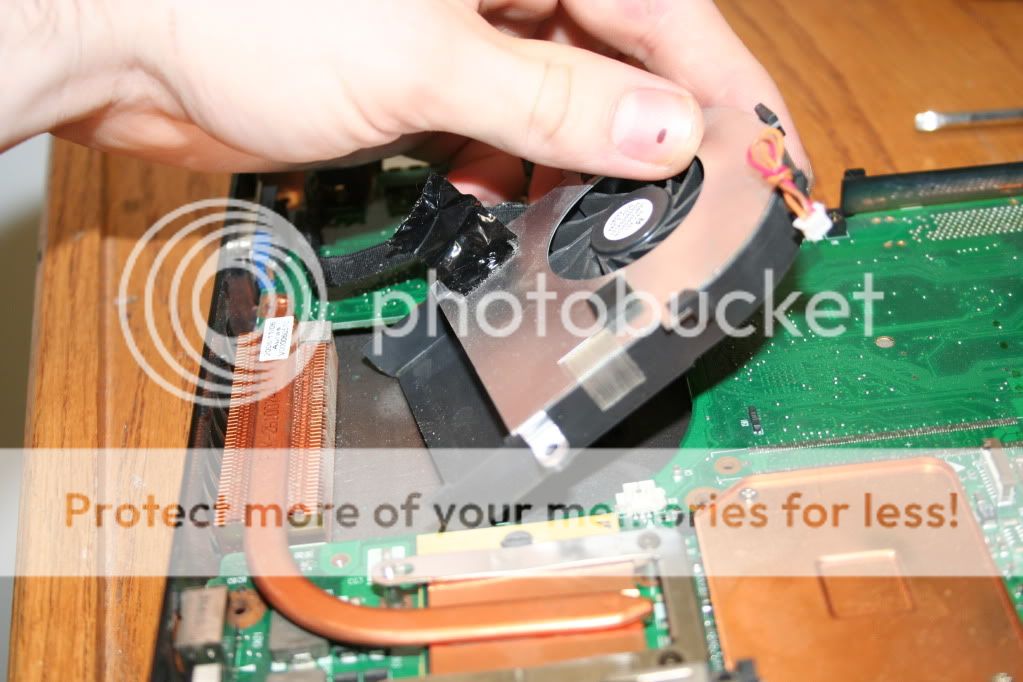
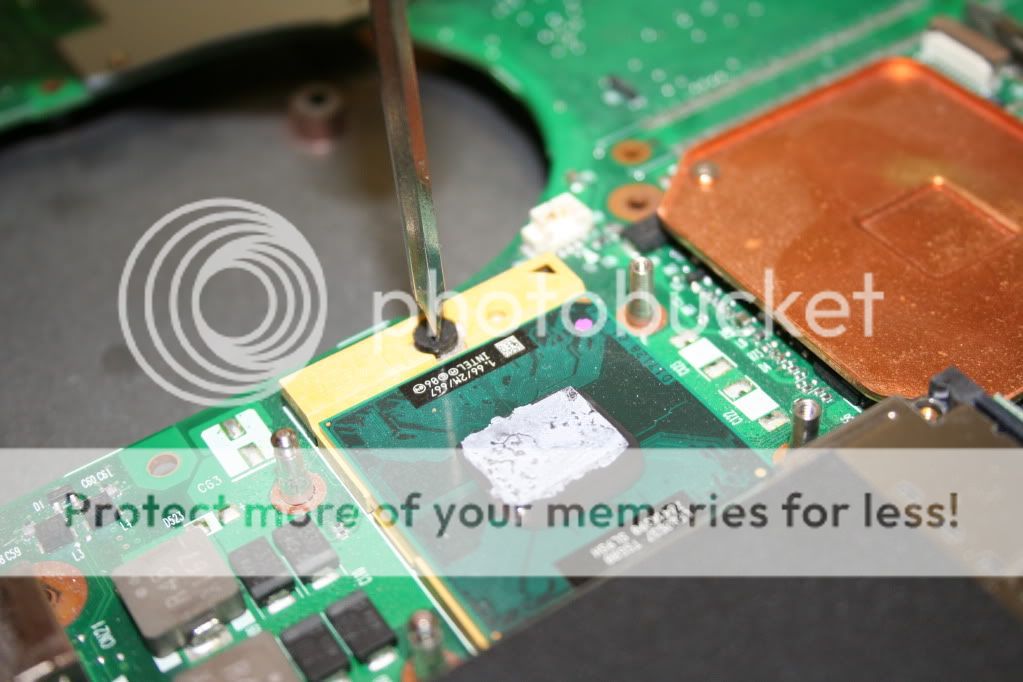
-Your CPU and/or CPU fan/heatsink
-Your hard disk
-Your optical disk holding screw
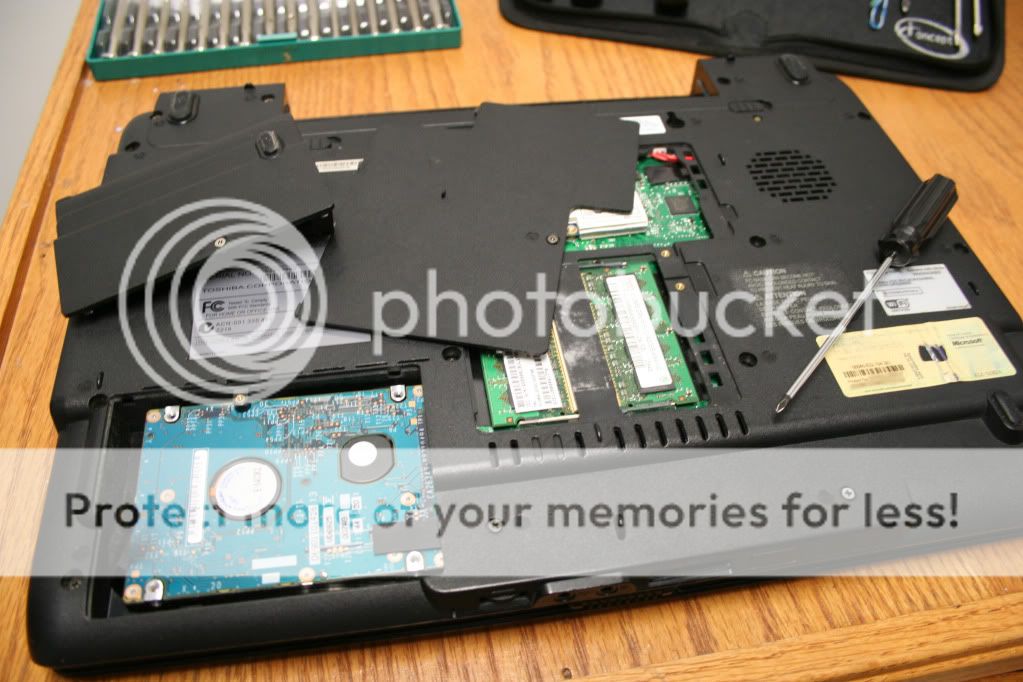
Removing the panels
Remove all of these components (except for the CPU/fan/heatsink) and set them aside in a safe place. Here's how to remove each one:
RAM:
There are two metal brackets running alongside the sticks. Push them, at the same time, away from the stick, and it should pop up slightly. Then simply pull it away from the socket at an angle.

Notice how the RAM angles - you'll need to insert and remove them with this angle
Wireless card:
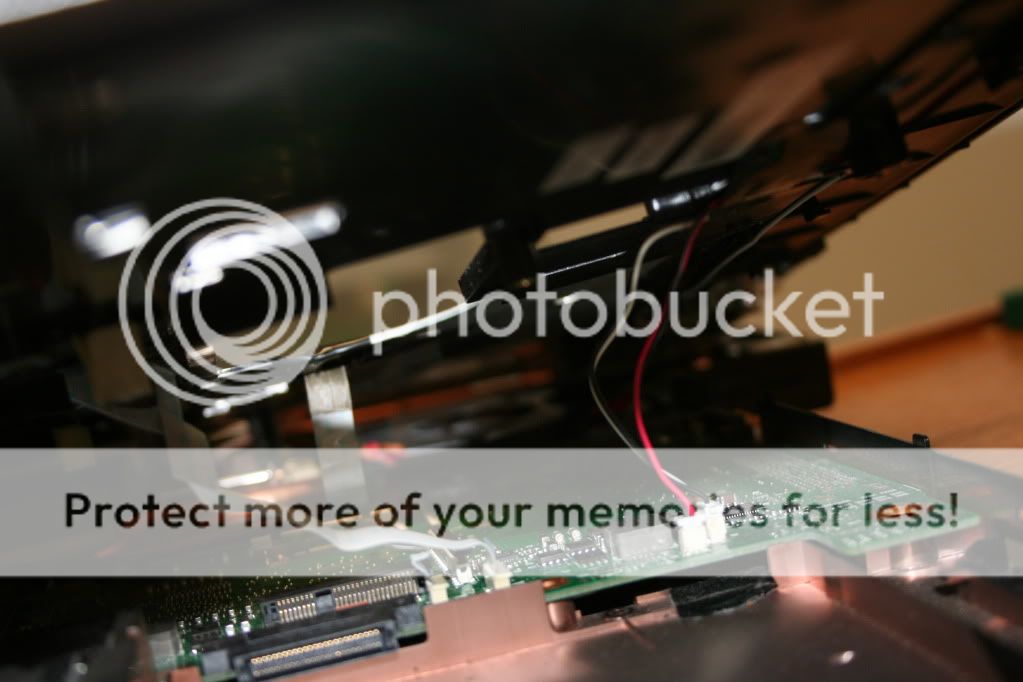
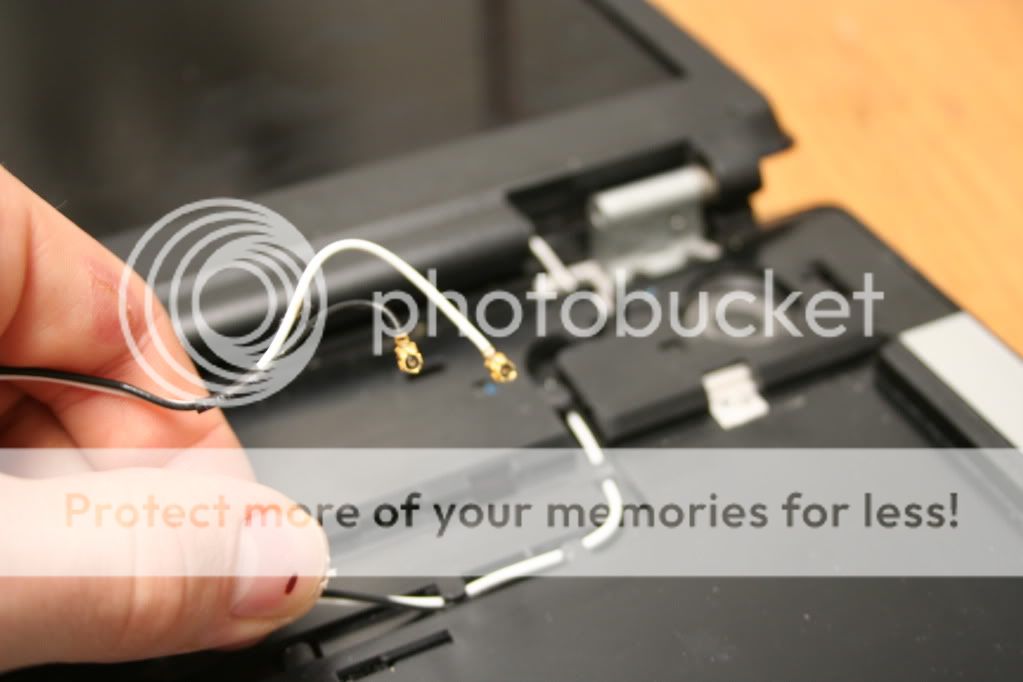
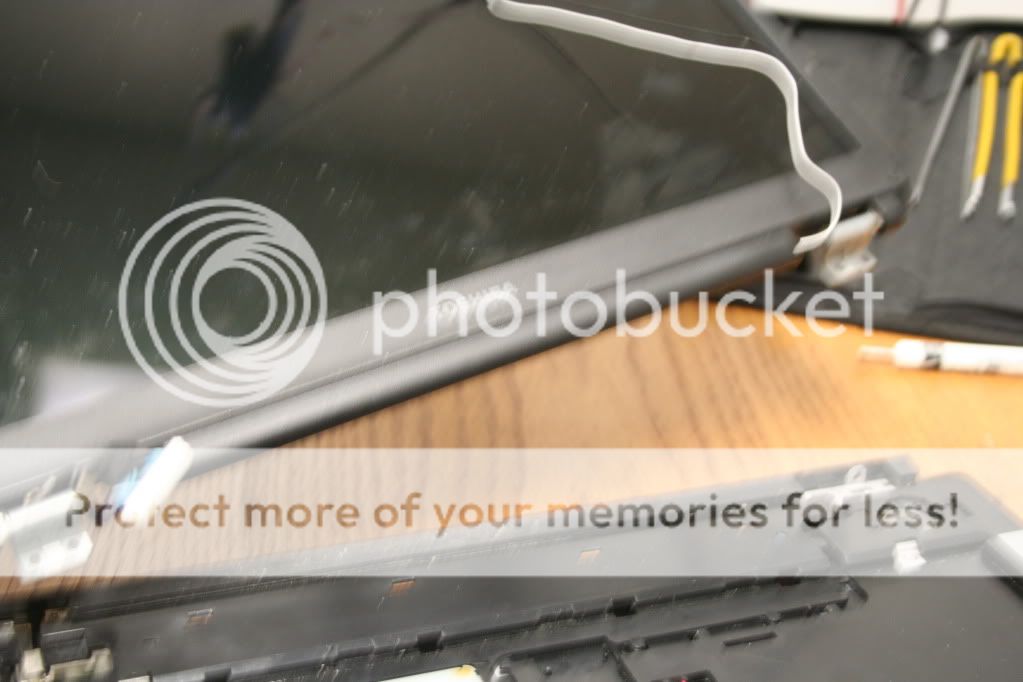
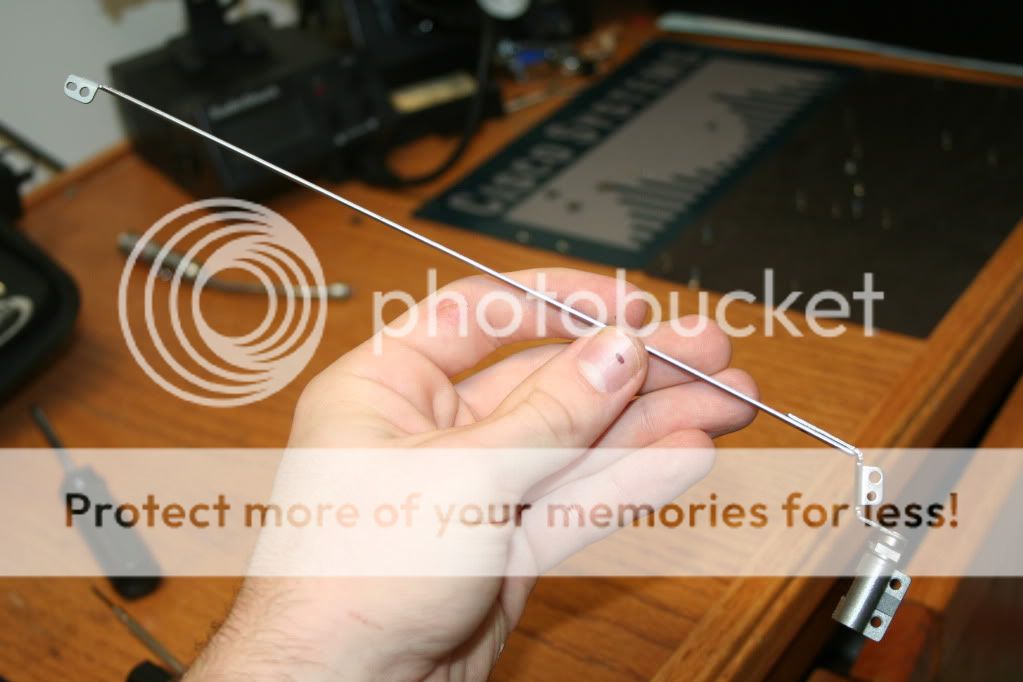
There are several antennas (2 or 3, depending on model) connected to the card. If you pull straight up on the connectors, they will simply pop off. If your card is PCI, follow the same procedure as you would with RAM. If your card is mini-PCI, you may need to unscrew two screws at the opposite end of the card with the connector to the motherboard. Then, slide the card out at an angle. If you've a bluetooth module, you'll find the procedure for removing it almost identical to the wireless card. On occasion it will be screwed down, as well.

My wireless card was in a different location
Hard disk:
All hard disk assemblies are different. There are probably 10 or so different kinds...some pull straight up, others slide, others unlatch, some simply unscrew...The only real thing I can say here is to take a good look at it and use your brain!
Optical disk:
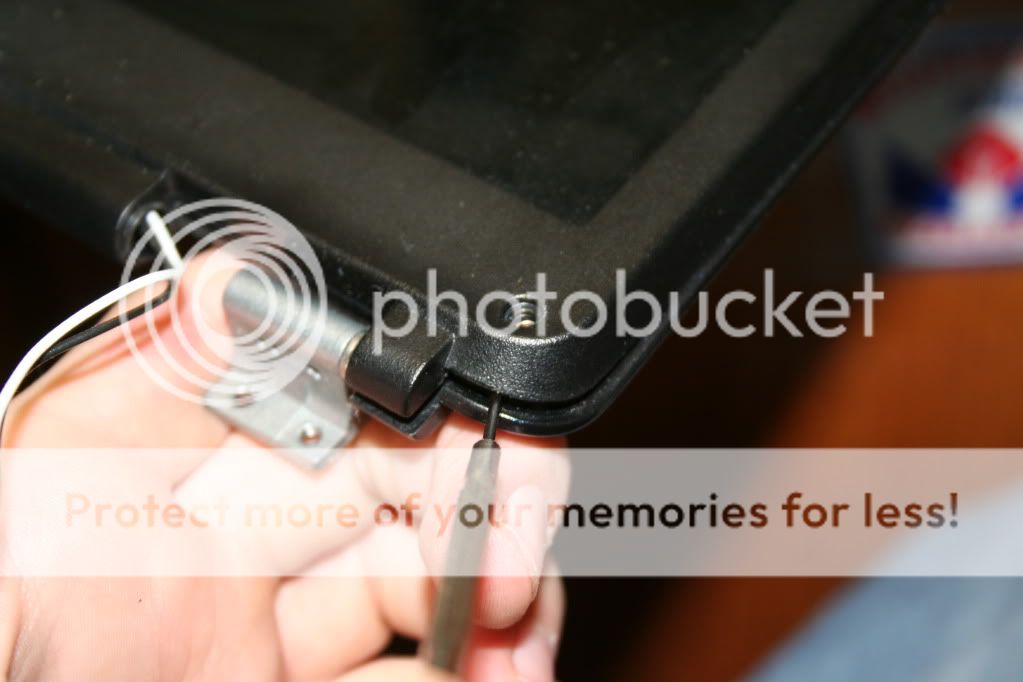
Some notebooks have a small metal tab held in place by a screw that holds your optical drive inside of the notebook. Unscrewing the screw and simply pushing on the drive casing will cause it to pop out of the notebook. If you don't see this, don't worry - this means the screw is upright on your notebook. We'll get it out when the keyboard comes off.

The optical drive pops out with a push
STOP HERE IF:
-You are replacing your hard disk
-You are upgrading your RAM
-You are upgrading your wireless card
-You are cleaning your CPU fan/heatsink (if it is revealed) and do not wish to completely disassemble your machine
-You are replacing your optical drive, and have access to it on your model
3. You'll notice the bottom of your notebook is covered in screw holes. Yup. You're taking them all out. Take your time (be careful not to strip them!) and place the screws on your magnet or paper in relation to where you took it out of the notebook. Sometimes, a screw will be reluctant to come out of it's hole - if this is the case, take your strong point magnet and attach it about halfway up to your screwdriver. Then place your screwdriver in the hole and carefully unscrew until you think the screw is free, and gently pull straight up. With some luck, the extra magnetic force will be enough to get the screw to come out. Sometimes manufacturers will be sneaky and place screws right at the edge of the casing underneath your optical drive - make sure you check back here when you remove your drive (if you haven't already).
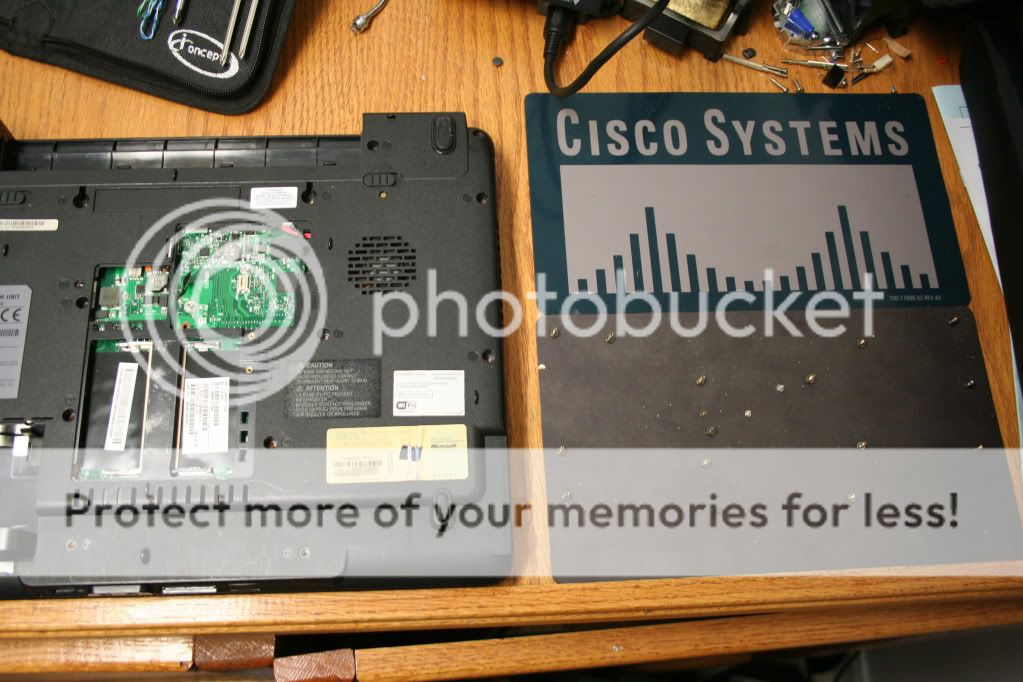
I use big CISCO magnets to hold screws - the top one is for screws that were right side up, the bottom vise versa

Use a magnet with your driver to coax a screw out
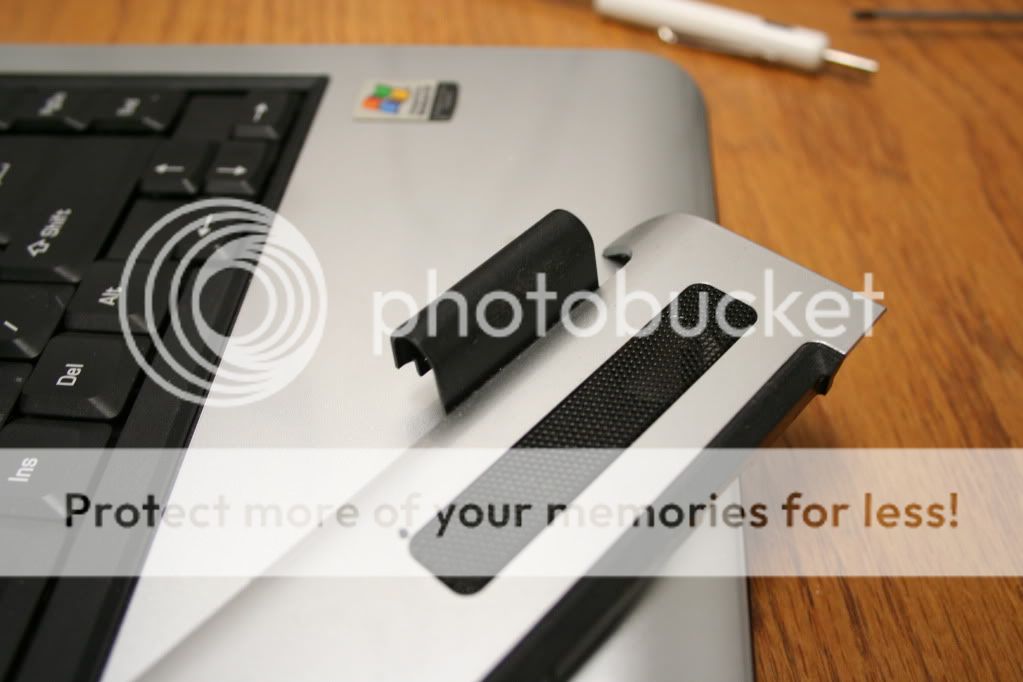
4. Turn the notebook over, so it is now right side up. Open the monitor. On most notebooks, the upper portion of the chassis right before the monitor is a separate plastic piece. It may have your power button and volume controls (if present) built into it, it may not. Whatever the case, it's held in place by plastic clips. (and sometimes screws...but you removed all of those, correct? It never hurts to double-check.) Go near the edge of the notebook (or if you see a better pry-point, take it!) with a fine flathead screwdriver and firmly but gently pry the peice up.
Note: If the plastic pieces that cover your screen hinges prevent this piece's removal, go to step 6 and come right back here when you're done!
If you're careful, you won't do any damage to the plastic, but in some cases you may make a gouge where your screwdriver was - this is where smaller screwdrivers are the best. Once you get most of it up, you should be able to pry the rest off with your hands. After a few snaps and pops, the peice should be off. If it does have some sort of control on it, you'll need to remove the cable that connects to the motherboard now. Most of the time the cable can simply be pulled out, but sometimes it's held in place by a (usually) brown clip that must be pulled up. Just use your hand or a driver to pry it up, and the cable should pop out. Be very careful with these cables - they have very fine leads, and can easily be damaged by too much force or too many disassemblies.

The top piece with the speakers is what we're removing...

Which pops open with some prys with a screwdriver
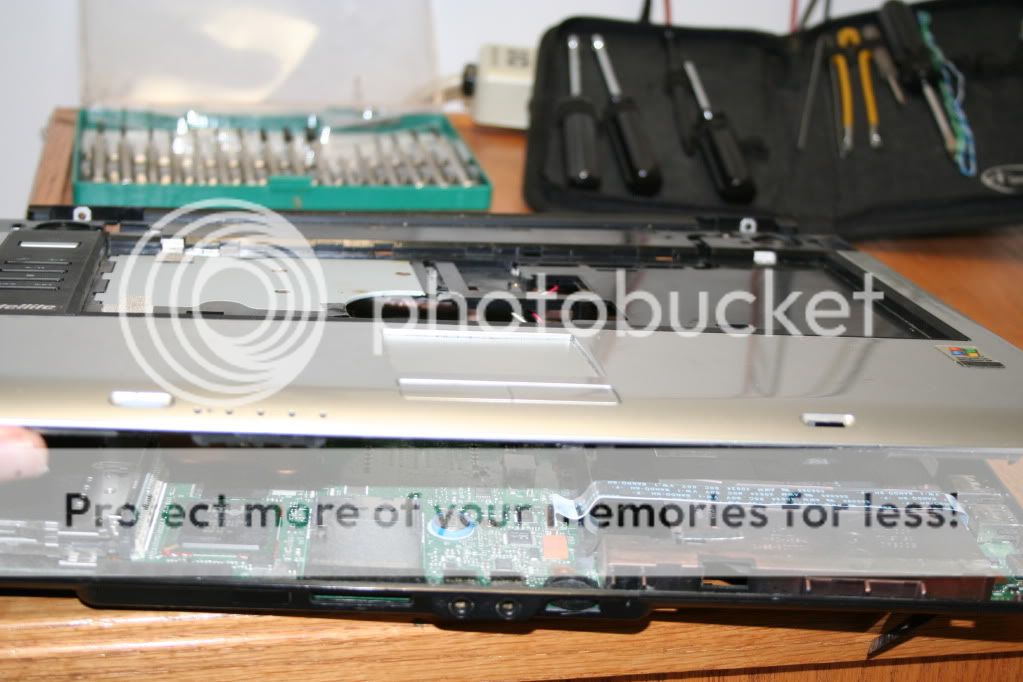
5. Now it's time to remove your keyboard. Most notebooks will have a line of screws visible now which hold the keyboard down. Remove them, and slide the keyboard a bit up toward the monitor. You should now be able to easily lift it up a centimeter or two...but, surprise, there's another cable. It's a bigger version of the one you just dealt with. Unclip it, and remove the keyboard.

Note the part of the connector in black - you'll need to pop this straight up to remove the keyboard cable
STOP HERE IF:
-You are cleaning/replacing your keyboard
http://www.tomshardware.com/forum/54096-35-hardware-repair-guide-suggestion-comment-thread
This guide is here to help you through any major difficulties you encounter with your notebook either in function or in disassembly. Because notebook designs are so different from model to model, I did my best to make it pretty detailed and covering all the bases of notebooks I've repaired before, so it is a bit lengthy. I'm writing up some other guides on doing more specific repairs like power jack resoldering and such, but this guide should tell you how to get to where you need to be and how to replace any general part on your notebook. First, I'll post a simple disclaimer...
Be advised this guide is general - all notebooks are different. Not all of the instructions will pertain to your notebook. I am not responsible for what happens to your notebook as a result of you reading this!
During the guide, I'll put in big red letters LIKE THIS at certain points to tell you where to stop if you're performing certain tasks like upgrading your RAM or replacing your power jack.
Notebooks are not unlike their desktop brethren, but sometimes do take extra care and tools to get the same jobs done. The tools listed here are ones I prefer, but you don't necessarily need them all. When taking apart a notebook, these are the tools that are on my desk:
-2 large magnets - These are an excellent way to hold your screws in place and remember where they go...you can get easily confused. If you don't have large magnets, you can substitute these with simple paper (don't hit it!) or paper covered in double-sided tape.
-Sets of screwdrivers, including a small precision set.
-A set of small pliers
-A strong point magnet (you'll see what this is for later)
-A small, single LED flashlight
A note about Electrostatic Discharge (ESD):
Many of you may be desktop veterans, and you all know that by leaving your PSU plugged in and touching the power supply with your bare hands, you can "ground" yourself, effectively clearing any static electricity in your hands that can kill sensitive computing components. Notebooks, though, are not equipped with internal power supplies, nor do they have dedicated grounds! You can solve this problem by touching any metal object nearby that is already grounded. While notebooks are not grounded, as they rely completely on DC power, most of the notebook's internal chassis is connected to the negative terminal, in effect, what's called a "chassis ground". This can help stop ESD if you make contact with it. And, of course, don't work on carpet or in a chair made of plastic or static-generating fabric.
For more, head here:
http://en.wikipedia.org/wiki/Electrostatic_discharge
A word to the wise:
If it won't move, don't force it to! Chances are you missed a screw someplace. Take some time and look at what you're working on. You'll find the place that's holding your component down soon enough.
~~~~~~~~~~~~~~~~~~~~~~~~~~~~~~~~~~~~~~~~~~~~~~~~~~~~~~
~~~~~~~~~~~~~~~~~~~~~~~~~~~~~~~~~~~~~~~~~~~~~~~~~~~~~~
Now, on to disassembly. Providing pictures for today is my brother's old(er) Toshiba, which I've actually never disassembled. It should give a good depiction on what's inside of a notebook that's rather dirty.
1. First, unplug your notebook and remove it's battery. Generally the battery has a release catch or locking mechanism on the bottom. It should be clearly marked. If your optical disk drive is equipped with a quick-release mechanism (usually a latch or catch on the bottom, but sometimes can also be a spring-loaded lever on the side of the notebook) you can remove it now. It may be held in place by a screw, so pay attention.
2. There are several (or may only be one) cut-out panels on the bottom of your notebook. Remove the screws holding them in and pop them off. You may need to use a flathead screwdriver to pry the panels off. What is revealed and how many panels there are depend on make and model, but here are some typical things that it may reveal:
-Your RAM
-Your wireless card
-Your CPU and/or CPU fan/heatsink
-Your hard disk
-Your optical disk holding screw
Removing the panels
Remove all of these components (except for the CPU/fan/heatsink) and set them aside in a safe place. Here's how to remove each one:
RAM:
There are two metal brackets running alongside the sticks. Push them, at the same time, away from the stick, and it should pop up slightly. Then simply pull it away from the socket at an angle.
Notice how the RAM angles - you'll need to insert and remove them with this angle
Wireless card:
There are several antennas (2 or 3, depending on model) connected to the card. If you pull straight up on the connectors, they will simply pop off. If your card is PCI, follow the same procedure as you would with RAM. If your card is mini-PCI, you may need to unscrew two screws at the opposite end of the card with the connector to the motherboard. Then, slide the card out at an angle. If you've a bluetooth module, you'll find the procedure for removing it almost identical to the wireless card. On occasion it will be screwed down, as well.
My wireless card was in a different location
Hard disk:
All hard disk assemblies are different. There are probably 10 or so different kinds...some pull straight up, others slide, others unlatch, some simply unscrew...The only real thing I can say here is to take a good look at it and use your brain!
Optical disk:
Some notebooks have a small metal tab held in place by a screw that holds your optical drive inside of the notebook. Unscrewing the screw and simply pushing on the drive casing will cause it to pop out of the notebook. If you don't see this, don't worry - this means the screw is upright on your notebook. We'll get it out when the keyboard comes off.
The optical drive pops out with a push
STOP HERE IF:
-You are replacing your hard disk
-You are upgrading your RAM
-You are upgrading your wireless card
-You are cleaning your CPU fan/heatsink (if it is revealed) and do not wish to completely disassemble your machine
-You are replacing your optical drive, and have access to it on your model
3. You'll notice the bottom of your notebook is covered in screw holes. Yup. You're taking them all out. Take your time (be careful not to strip them!) and place the screws on your magnet or paper in relation to where you took it out of the notebook. Sometimes, a screw will be reluctant to come out of it's hole - if this is the case, take your strong point magnet and attach it about halfway up to your screwdriver. Then place your screwdriver in the hole and carefully unscrew until you think the screw is free, and gently pull straight up. With some luck, the extra magnetic force will be enough to get the screw to come out. Sometimes manufacturers will be sneaky and place screws right at the edge of the casing underneath your optical drive - make sure you check back here when you remove your drive (if you haven't already).
I use big CISCO magnets to hold screws - the top one is for screws that were right side up, the bottom vise versa
Use a magnet with your driver to coax a screw out
4. Turn the notebook over, so it is now right side up. Open the monitor. On most notebooks, the upper portion of the chassis right before the monitor is a separate plastic piece. It may have your power button and volume controls (if present) built into it, it may not. Whatever the case, it's held in place by plastic clips. (and sometimes screws...but you removed all of those, correct? It never hurts to double-check.) Go near the edge of the notebook (or if you see a better pry-point, take it!) with a fine flathead screwdriver and firmly but gently pry the peice up.
Note: If the plastic pieces that cover your screen hinges prevent this piece's removal, go to step 6 and come right back here when you're done!
If you're careful, you won't do any damage to the plastic, but in some cases you may make a gouge where your screwdriver was - this is where smaller screwdrivers are the best. Once you get most of it up, you should be able to pry the rest off with your hands. After a few snaps and pops, the peice should be off. If it does have some sort of control on it, you'll need to remove the cable that connects to the motherboard now. Most of the time the cable can simply be pulled out, but sometimes it's held in place by a (usually) brown clip that must be pulled up. Just use your hand or a driver to pry it up, and the cable should pop out. Be very careful with these cables - they have very fine leads, and can easily be damaged by too much force or too many disassemblies.
The top piece with the speakers is what we're removing...
Which pops open with some prys with a screwdriver
5. Now it's time to remove your keyboard. Most notebooks will have a line of screws visible now which hold the keyboard down. Remove them, and slide the keyboard a bit up toward the monitor. You should now be able to easily lift it up a centimeter or two...but, surprise, there's another cable. It's a bigger version of the one you just dealt with. Unclip it, and remove the keyboard.
Note the part of the connector in black - you'll need to pop this straight up to remove the keyboard cable
STOP HERE IF:
-You are cleaning/replacing your keyboard


") , but I think this is a little too much to handle for an inexperienced one such as myself...I'll just leave my laptop in its frequently-shutting down -due-to-overheating state for a while longer I suppose...
, but I think this is a little too much to handle for an inexperienced one such as myself...I'll just leave my laptop in its frequently-shutting down -due-to-overheating state for a while longer I suppose...